September 16, 2023
Table of Contents
Weekends are my time to break things and build things. My homelab runs a full generative AI stack - models, workflows, UIs - and I use that freedom to experiment with stuff that commercial services either don’t offer or charge a premium for. This particular weekend, I set myself a challenge: take a single base image and turn it into a fully interactive AI character - custom artwork, custom personality, running entirely on local hardware. No cloud APIs, no subscriptions, no data leaving my network.
What started as a quick experiment turned into one of those “wait, this actually works?” moments that remind me why I run a homelab in the first place. The tools have gotten good enough that creative AI isn’t just for people with enterprise budgets anymore - it’s for anyone with a decent GPU and a free weekend.
What Can You Do with Img2Img?
The first experiment used a technique called Img2Img (Image-to-Image) generation. You start with a base image and let the AI generate variations - same composition, completely different artistic style. Think of it like giving a photographer’s shot to ten different painters and asking each of them to reimagine it.
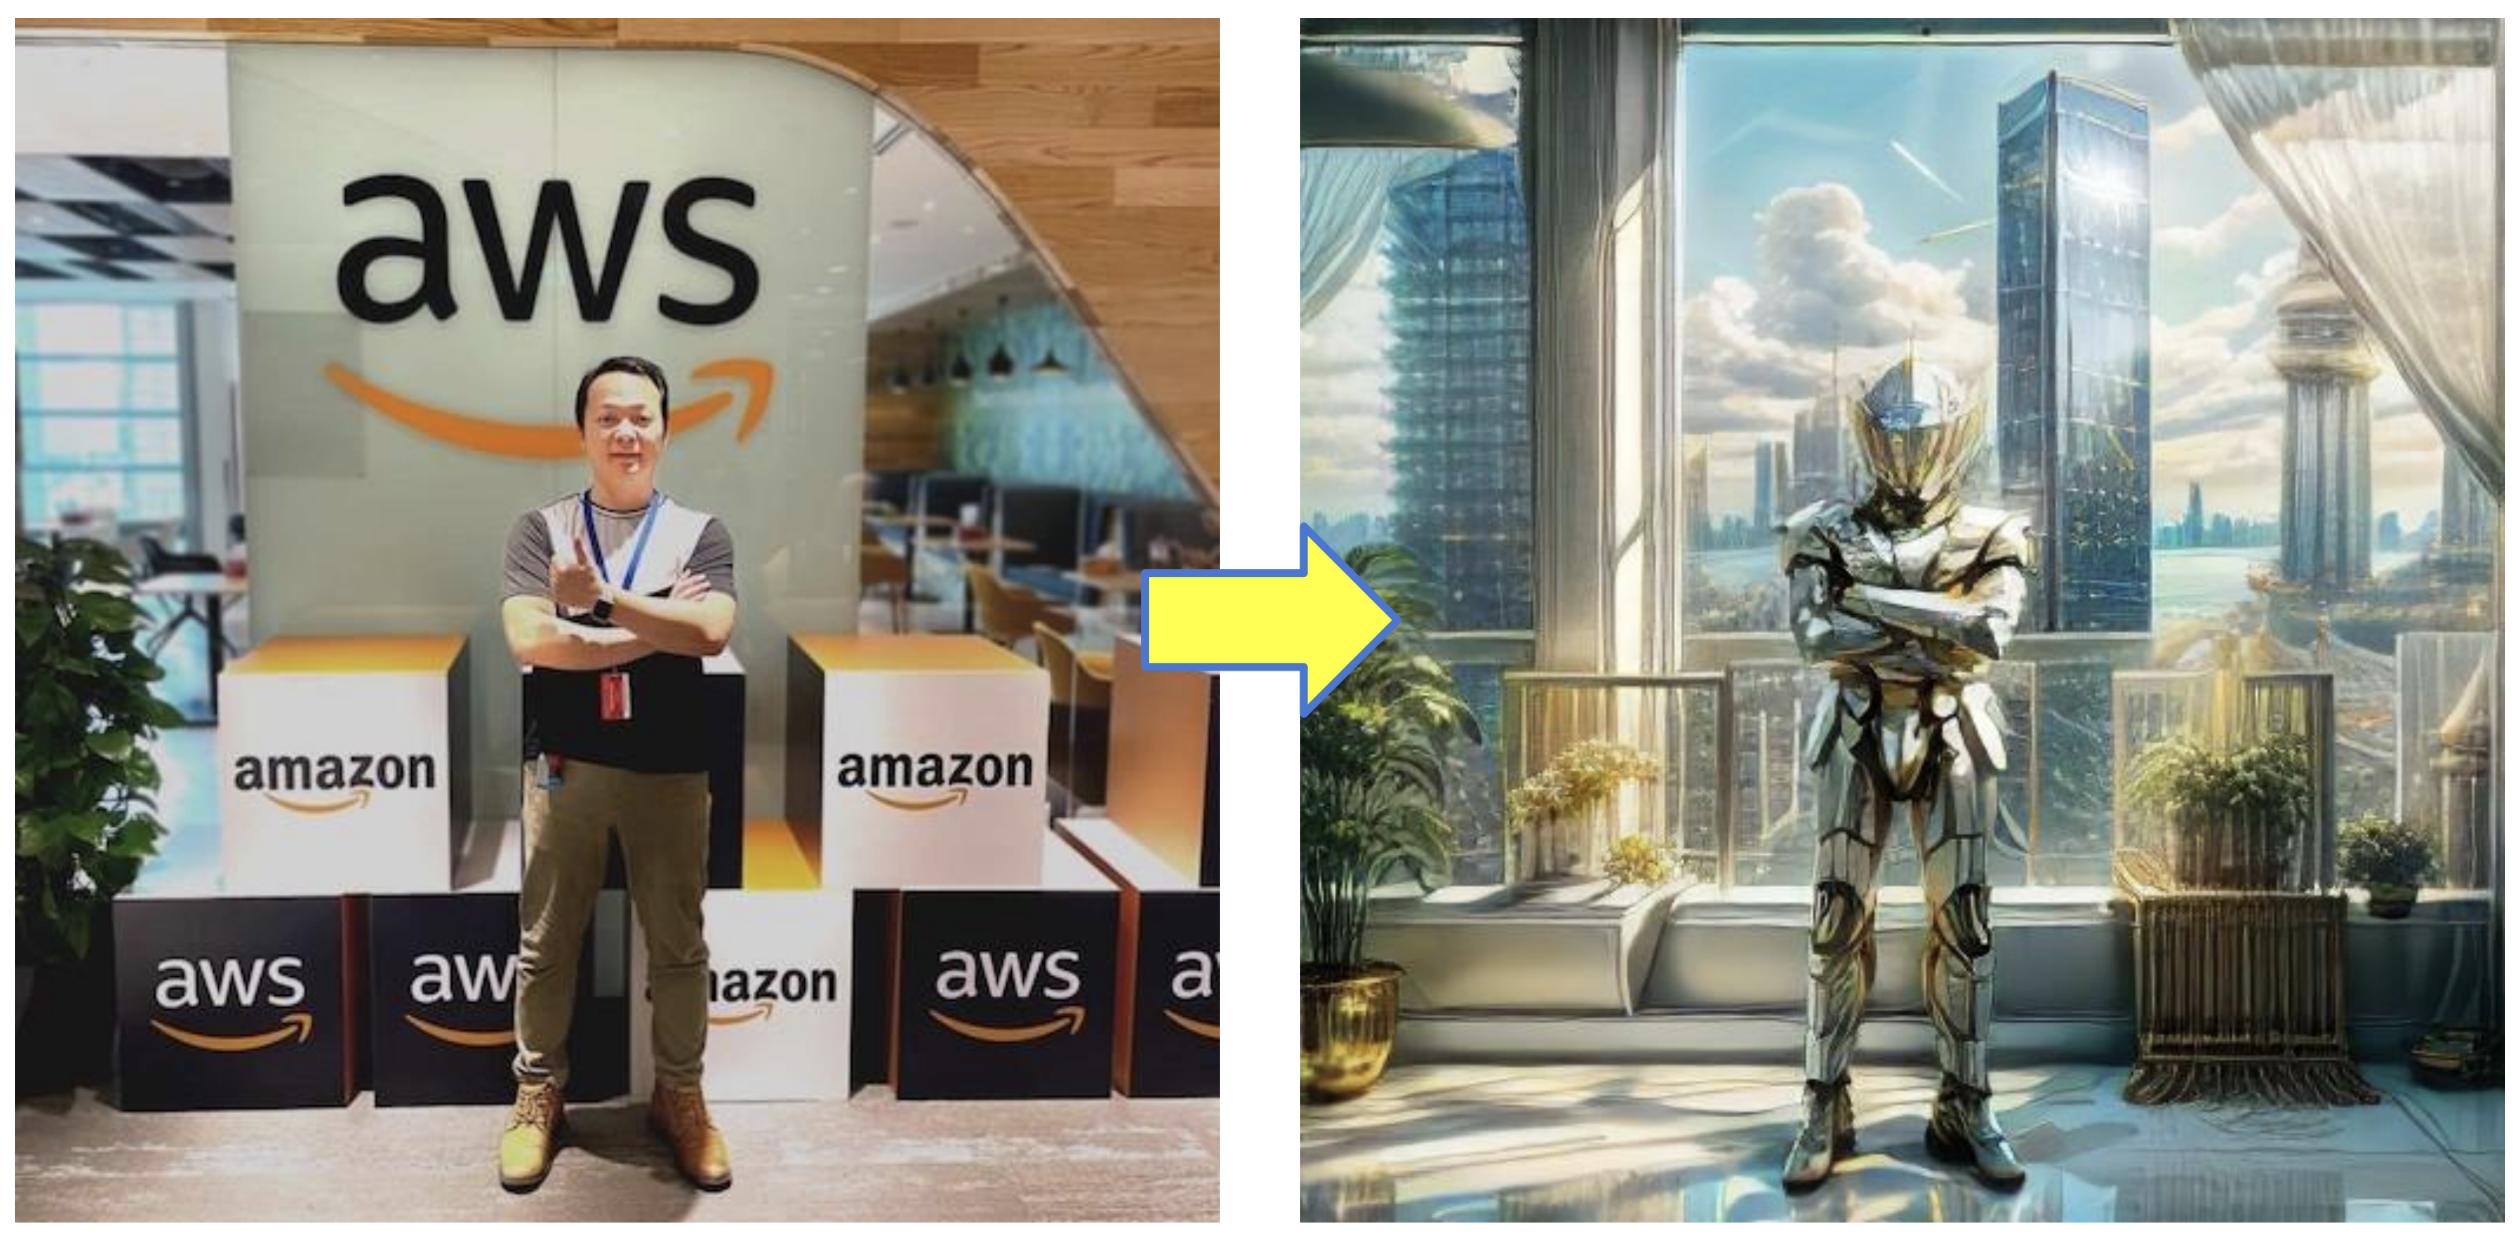
The results were genuinely impressive. From a single base image, the model produced unique variations, each with its own artistic interpretation. What would take a human artist hours to conceptualize, the AI iterated through in minutes. According to a Stability AI benchmark, Stable Diffusion generates images at roughly 2-5 seconds per iteration on consumer GPUs - meaning you can explore dozens of creative directions in the time it takes to finish a cup of coffee. But generating random images is one thing - how do you get consistent, repeatable results?
How Does the ComfyUI Workflow Work?
The key to repeatable results is a well-structured workflow. I used ComfyUI - a node-based UI for Stable Diffusion that gives you granular control over every step of the generation pipeline. Unlike the simpler Automatic1111 web UI, ComfyUI treats image generation like a programmable pipeline where you wire up nodes like building blocks.
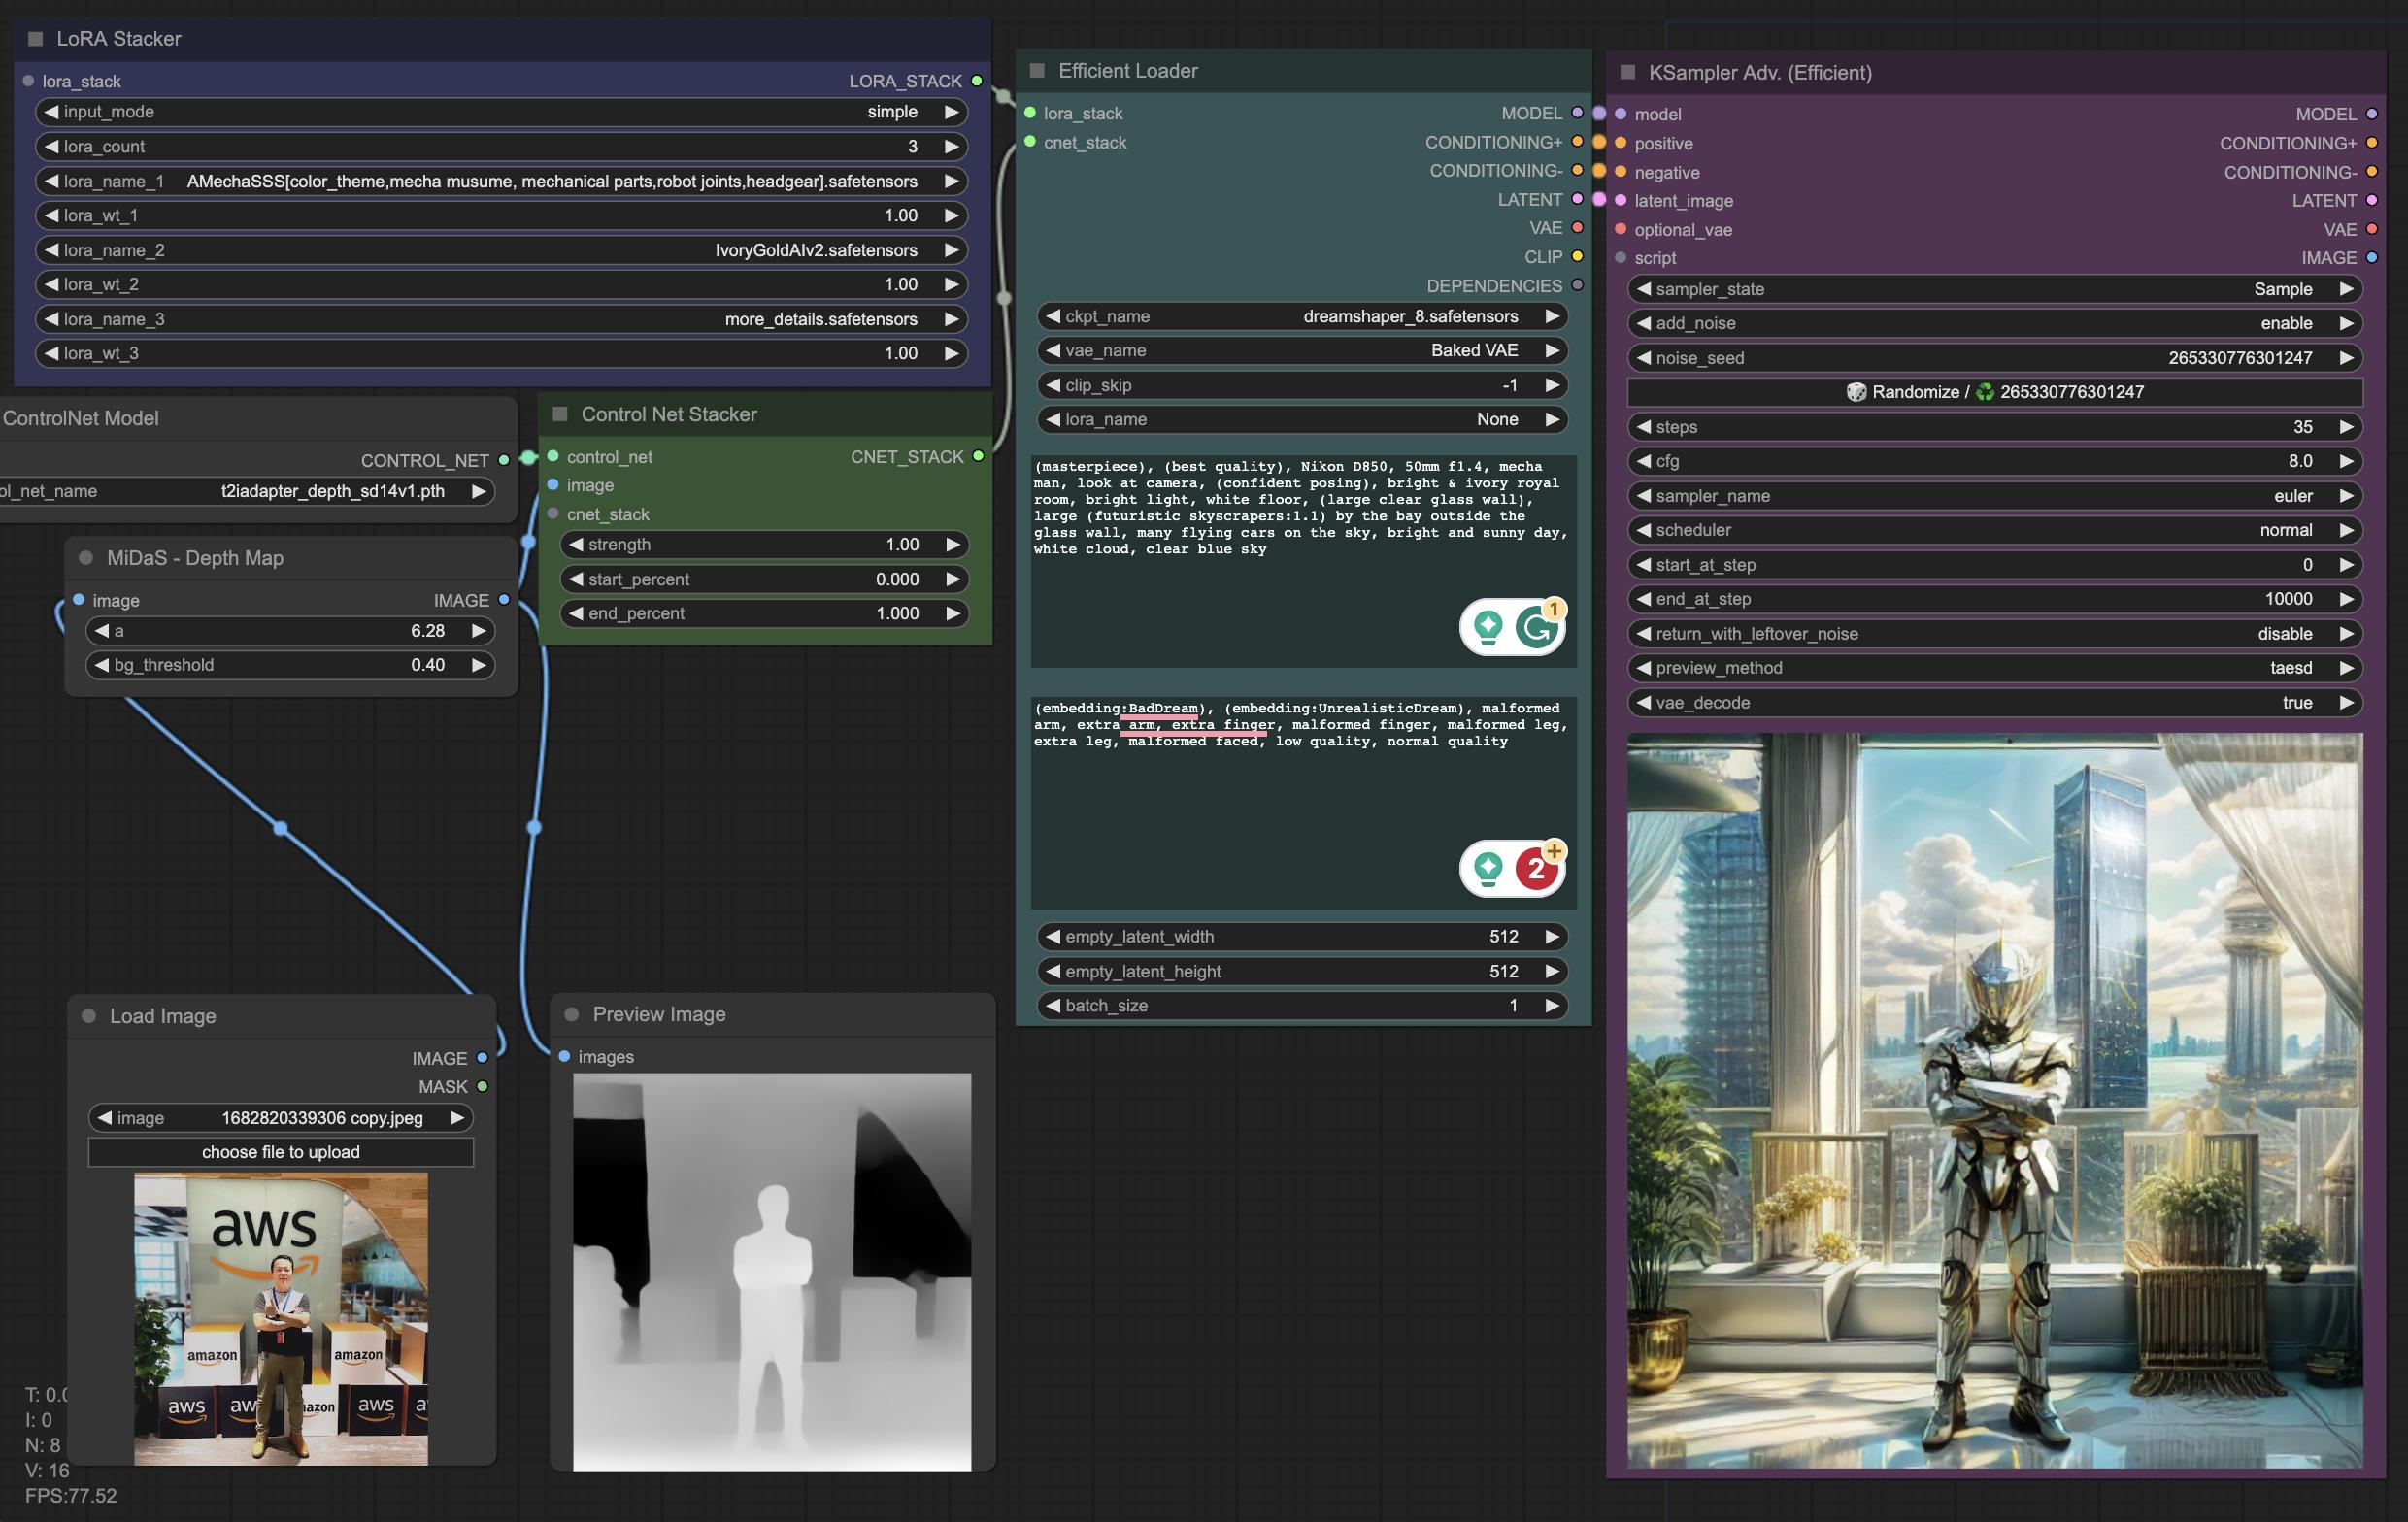
Here’s the pipeline I settled on:
| Step | What It Does | Tool/Model |
|---|---|---|
| 1. Load base image | Starting point for the transformation | Any image |
| 2. Pre-processing | Generate a depth map to guide composition | Depth Map node |
| 3. Checkpoint selection | Load a pre-trained model as the generation foundation | DreamShaper |
| 4. Prompt engineering | Positive and negative prompts to steer style and content | Text nodes |
| 5. Post-processing | Enhance quality and refine details | LoRAs (Low-Rank Adaptation) |
The depth map step is critical - it tells the model where things should be in the frame without constraining what they look like. This gives you creative freedom while maintaining compositional coherence. I spent a good hour tweaking this step alone, and the difference between “random AI art” and “intentional creative output” lives in these details. Once the image was looking right, the obvious next question was: what else can you do with it?
Can You Build a Full AI Character?
The second experiment combined the generated image with a local chat model to create a custom AI character. I used the newly generated artwork as an avatar in my self-hosted chat interface:
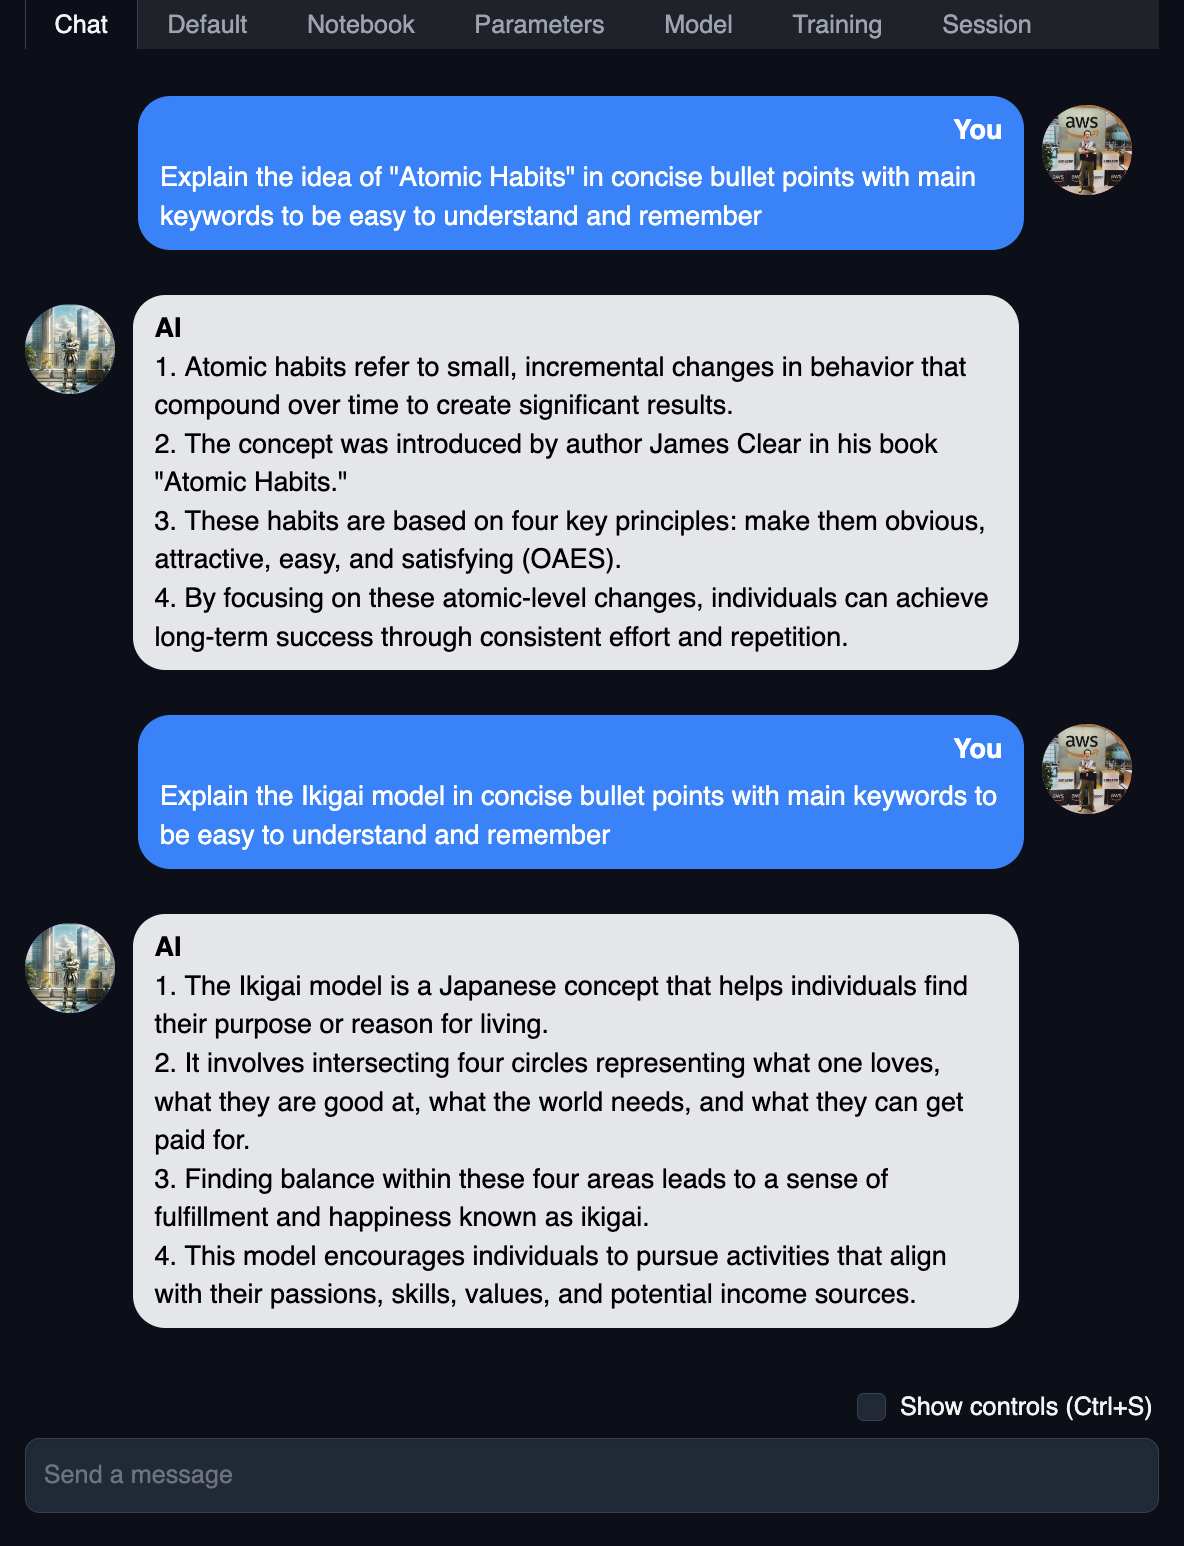
The chat was powered by Marcoroni-13B, quantized into GGUF format by Tom Jobbins. Based on Llama 2, it was one of the highest-scored models on the Open LLM Leaderboard at the time. Running the chat model locally meant zero API costs, zero data leaving my network, and complete freedom to customize the character’s personality and behaviour.
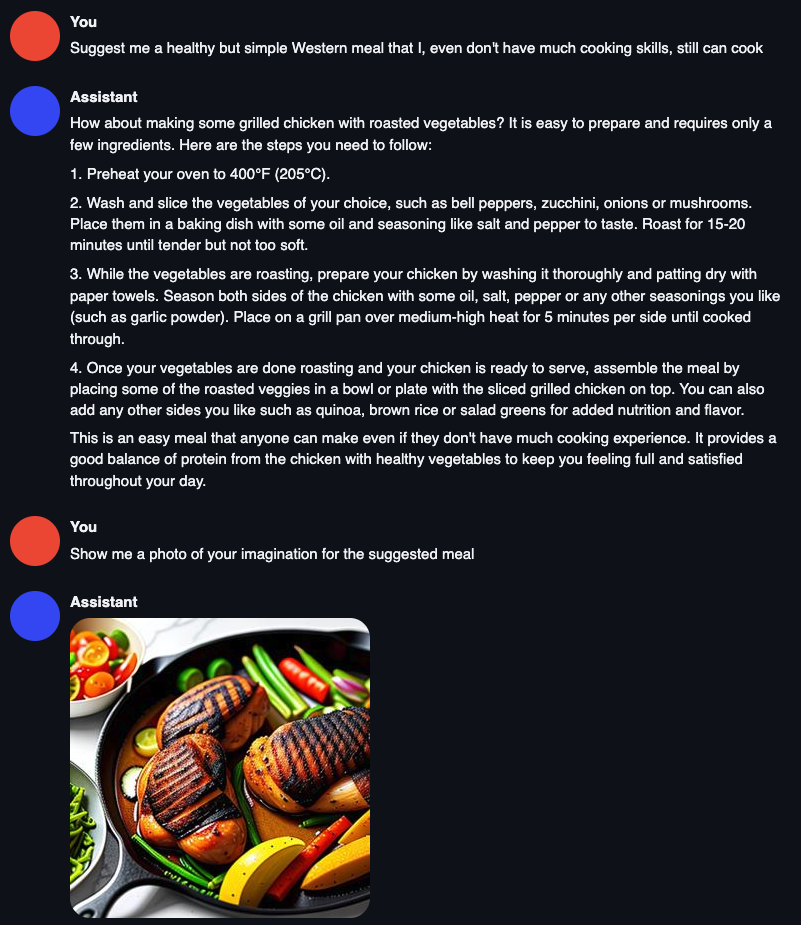
The combination of a custom-generated avatar with a locally-hosted language model created a surprisingly engaging and immersive experience. The whole pipeline - from base image to interactive character - took about two hours, and the creative loop is addictively tight: generate an image, tweak the style, assign a personality, test the conversation, iterate. All on your own hardware.
Key Takeaways
- Self-hosted GenAI is genuinely fun. The freedom to experiment without API costs or data privacy concerns changes what you’re willing to try.
- ComfyUI’s node-based approach is powerful. Once you build a workflow, it’s reproducible and tweakable. Far better than prompt-and-pray.
- Local models are good enough for creative work. You don’t need GPT-4 or Claude for character chat or artistic generation. A well-quantized 13B model on consumer hardware delivers solid results.
- The creative loop is tight. Generate, iterate, customize - all within minutes, all on your own hardware.
Start here: download ComfyUI, grab a checkpoint model from Civitai, and run an Img2Img workflow on any photo you have. The default settings are a perfectly fine starting point. The first time the AI transforms your image into something you didn’t expect, you’ll understand why homelabbers can’t stop tinkering with this stuff.
Share :
You May Also Like
Transforming Industries with Text and Image Generative AI
I’ve been running Stable Diffusion and language models on my homelab for a few months now, and the thing that keeps striking me isn’t the output quality - although that’s improved …
Read More
The Modern Leader
There’s a pattern I’ve seen play out more than once. A team ships a big release, leadership celebrates, and within weeks the strongest engineers start disengaging. They become quieter in …
Read More